Ever wanted your Community Cloud groups on the Customer Service (Napili) template to look different from one another?
With Salesforce’s Spring ’17 release, you can now customize each group! Specifically, you can customize components, actions, the publisher, and related lists in groups.
There wasn’t any documentation on how to actually do this. Unfortunately, it does take quite a few steps to customize your groups. It involves using Group Record Types and Page Variations in the Community Builder.
Objective
- Personalize groups on Community Cloud with Group Page Layouts and Group Record Types
- Use Page Variation in Community Cloud to use different components in individual community groups
Estimated Time
~30 minutes
Requirements
- Some Salesforce Admin experience
- Some familiarity with Community Builder on Community Cloud
Background
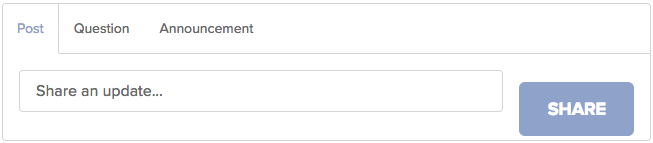
As the community manager at my current org, I had a hard time encouraging users to use the Question publisher when they post their questions. Because the Post publisher appears first by default, naturally a user’s inclination would be to use that instead.
While it’s easy to make this change for feeds with Global Publisher Actions, it’s a more intricate process to do this for groups.
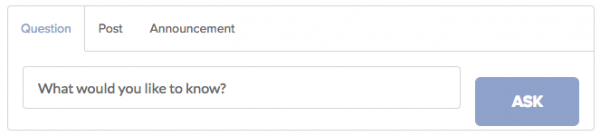
Let’s take a look at a possible use case. Using the example laid out in the Spring ’17 release notes, you may have a group dedicated to customer service and want the publisher to default to Question:
Customizing Publisher Actions for Individual Community Groups
Set Up Group Page Layouts
If you want to customize groups to show different publisher options first, you must first set up a group page layout:
- Navigate to Setup and search for “Group” on the left sidebar.

Click on Group Layouts under Groups (Customize -> Chatter -> Groups -> Group Layouts). You should see an existing page layout called Group Layout pre-created for you by Salesforce.- Click New.

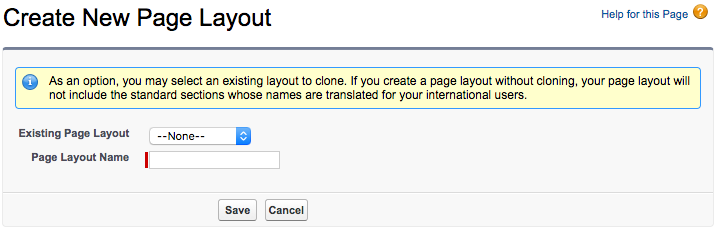
Fill out a name for your new group page layout and hit Save.
Under Salesforce1 and Lightning Experience Actions, click on the “override the predefined actions” link.- You should see a list of default actions listed. You can then re-arrange the publisher actions so that Question comes before Post. Click on Salesforce1 & Lightning Actions at the top, and drag the Question action to the publisher actions below:
Salesforce seems to tempt you with publisher actions such as Poll in the list of Salesforce1 & Lightning Actions. Even when dragged to the action panel below, they will not appear in the Customer Service (Napili) template as of Spring ’17. - Hit Save.
- Edit the default Group Layout, and drag the Change Group Type action into the action panel.
- Hit Save.


Set Up Group Record Types
To do this, you’ll have to create two different record types (if you don’t have a group record type yet):
- Navigate to Setup and search for “Group” on the left sidebar.
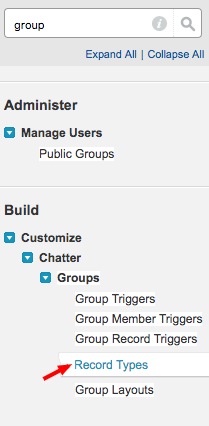
Click on Record Types under Groups (Customize -> Chatter -> Groups -> Record Types).- Click New. You’re creating a new “default” record type for groups that should have a “default” look.
- Give a name to your “default” record type under Record Type Label. For instance, I used the name “General.”
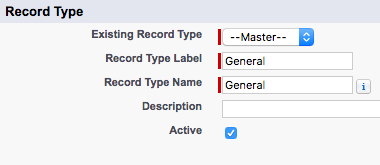
Check the Active checkbox.- Enable this record type to a profile by selecting the checkbox under the Enable for Profile column. Feel free to also check the Default column if applicable.
- Hit Next.
- Apply a group page layout to your profiles.
- Click Save.
Change a Group’s Record Type
- Go back to your community.
- Navigate to a group where you want the newly created group page layout to be applied.
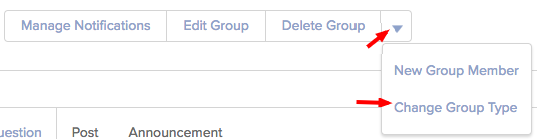
- Because you have dragged the Change Group Type action to your default Group Layout, you should see the Change Group Type link after clicking on the dropdown arrow:
- Select the desired record type you want to assign to this group, and hit next.
Customizing Components for Individual Community Groups
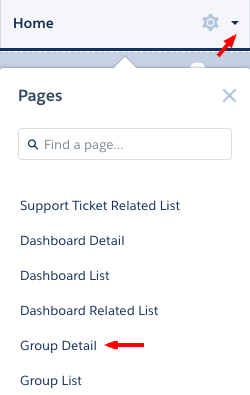
- Navigate to Community Builder.
- Click on the dropdown arrow at the top, and click on Group Detail under Object Pages:
- Click on the gear icon at the top:

- Click on the Page Variations tab.
- Click on New Page Variation if you want to start from scratch, otherwise duplicate the default Group Detail as your base to start with.
- Add or remove components to your liking. Some ideas: perhaps you want to add a dashboard component for an internal employee group.
- Click Publish on the top-right when you’re done.
- Go back to the Page Variations page and click on the dropdown arrow in the Actions column. Select Set Audience Criteria.
- Toggle to the Record Type tab on the left.
- Choose a group record type you want to associate with the page variation you just created, which in turn is associated with the groups you have assigned this record type to.
- Click Save.
Wrapping Up
Customizing your Community Cloud groups is currently a multistep process involving group record types. It’s not exactly the easiest for a Salesforce Administrator. But the fact that you can do this declaratively without knowing how to code still makes it worth learning to reenforce your knowledge on record types.
Is it possible to modify the group icon once group is created? I dont see that option in our community